How to Single Crochet for Beginners: Easy Step-by-Step Guide
If you want to learn how to single crochet for beginners without getting confused about hook placement, loop count, or where the next stitch goes, this tutorial walks you through the exact process. You’ll see how to start from a foundation chain, make your first single crochet, continue across the row, turn your work, and keep your stitch count even. I’ll also show you the small mistakes that cause crochet to get wider, narrower, or too tight, so you can spot problems early and fix them before they affect the whole swatch.
Single crochet is one of the first stitches worth learning because it is simple, compact, and used in everything from washcloths and scarves to amigurumi. In U.S. crochet patterns, single crochet is abbreviated as sc.
To make one single crochet stitch, you insert the hook into the stitch, pull up a loop so there are two loops on your hook, then yarn over and pull through both loops. That is the entire stitch.
Below, you will learn exactly where to place your hook, how to crochet the first row, how to start the next row, and how to keep your stitch count from changing.
What Is a Single Crochet Stitch?
A single crochet stitch is a short basic crochet stitch that creates a fairly dense fabric.
This tutorial uses U.S. crochet terminology. In U.K. crochet terminology, the same stitch is called double crochet (dc).
In U.S. patterns, you will usually see it written as:
If abbreviations such as sc, ch, and sl st are still confusing, see our guide to reading crochet patterns for beginners.
The basic movement is:
Insert hook → yarn over → pull up a loop → yarn over → pull through both loops.
When the stitch is complete, only one loop should remain on your hook.
Single crochet is especially useful for beginner practice because the stitches are short and easy to count once you learn what the top of each stitch looks like.
What You Need to Practice Single Crochet
You only need:
- Smooth yarn
- A crochet hook that works with your yarn
- Scissors
- A yarn needle for weaving in the ends later
- Optional: A stitch marker to help mark the first or last stitch
If you are completely new to crochet, start with our absolute beginner crochet guide to learn the slip knot, chain stitch, and basic hook control first.
For your first practice swatch, a light-colored, smooth yarn is easier to see than very dark, fuzzy, or textured yarn.
Follow the hook recommendation on your yarn label if you are unsure which size to use.
If hook sizes and yarn weights are still confusing, see our crochet hook sizes and yarn weights guide.
For an easy beginner practice swatch, choose a smooth, light-colored medium-weight yarn so the stitches are easier to see and count.
You do not need expensive supplies. The goal of this first swatch is simply to make stitches that are easy to see and count.
Before You Start: Know What Counts as a Stitch
This is where many beginners become confused.
When you have a loop sitting on your crochet hook, that loop is not counted as a chain or a completed stitch.
If you make 11 chain stitches, you should be able to count 11 separate chain links below the hook.
For the practice swatch below, we will:
Chain 11 → skip the first chain → make 10 single crochet stitches.
The Craft Yarn Council also teaches the first single crochet by skipping the first chain and working into the second chain from the hook.
How to Single Crochet for Beginners Step by Step
Step 1: Make a Slip Knot and Chain 11
Make a slip knot and place it on your crochet hook.
Create 11 chain stitches.
Try to keep the chains relaxed enough that you can insert your hook into them later.
Do not count the loop currently sitting on your hook as a chain.
What you should see:
A short chain with 11 visible links and one working loop on the hook.
Beginner mistake to avoid:
Do not pull every chain as tight as possible. A very tight starting chain can make the first row difficult to work.
Step 2: Find the Second Chain From the Hook
Look at the chain directly below your hook.
That is the first chain from the hook.
Do not work into it.
Move to the next chain. This is the second chain from the hook, and this is where you will make your first single crochet.
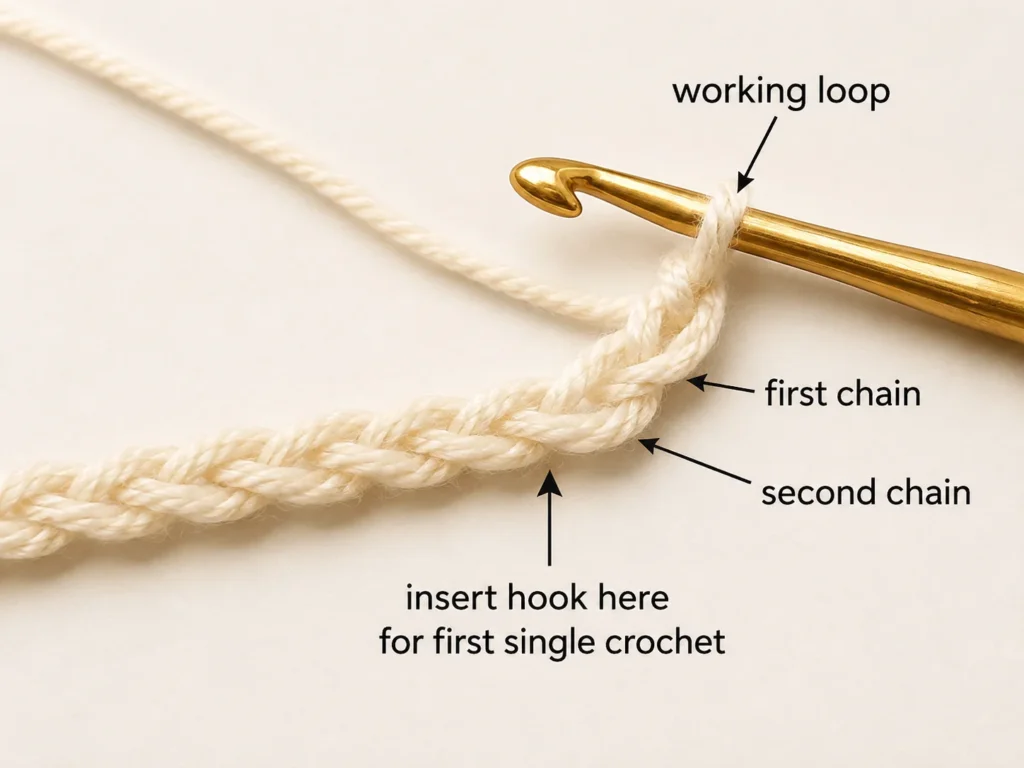
Remember that the working loop sitting on the hook is not included when you count chains.
What you should see:
One chain remains between the hook and the chain where you are about to insert your hook.
Beginner mistake to avoid:
Do not accidentally count the loop on the hook as the first chain.
Step 3: Insert the Hook Into the Second Chain
Insert the hook into the center of the second chain from the hook, taking care not to split the yarn.
Keep your working yarn behind or ready above the hook so you can yarn over next.
For this first practice piece, the main goal is to place the hook through the chain without splitting the yarn fibers.
What you should see:
The chain is sitting around the shaft or throat area of the hook, while the original working loop remains on the hook.
Step 4: Yarn Over and Pull Up a Loop
Bring the working yarn over the crochet hook.
Catch the yarn with the hook and pull it back through the chain.
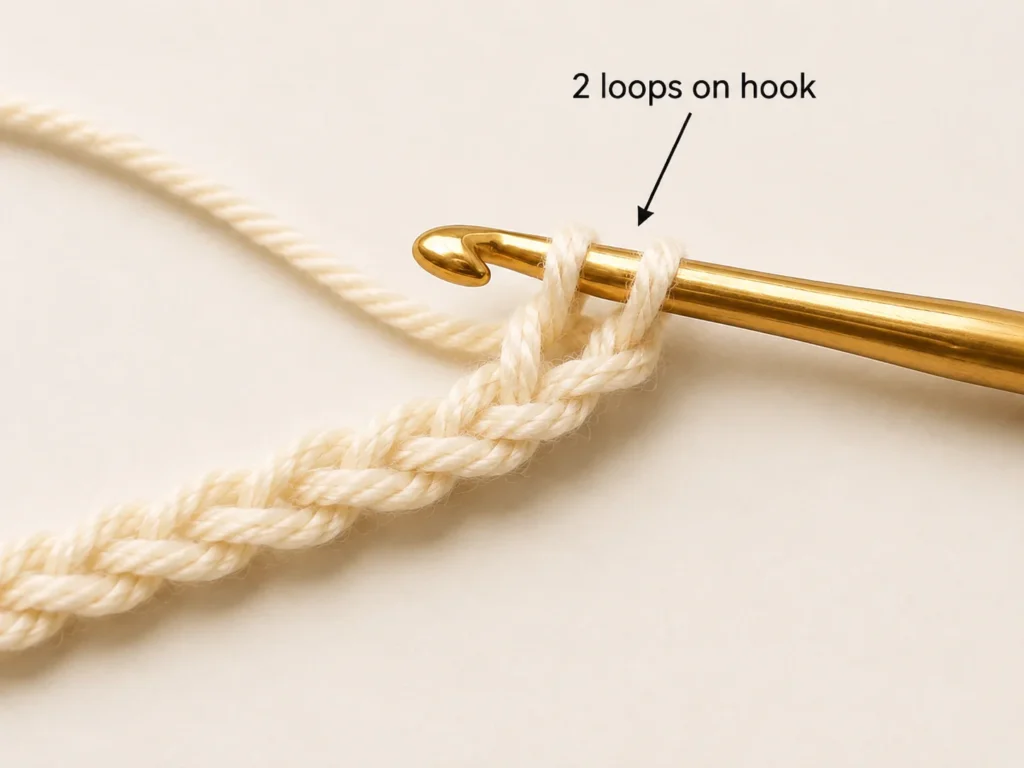
You should now have two loops on your hook.
Stop here for a moment and check.
If you still have only one loop, you probably pulled the new loop through the old loop as well. Undo the stitch and try again.
Correct checkpoint: 2 loops on hook.
Step 5: Yarn Over Again
Wrap the working yarn over the hook one more time.
You still have the two existing loops on your hook, plus the yarn you just caught.
Step 6: Pull Through Both Loops
Draw the yarn through both loops on the hook in one movement.
You should now have only one loop remaining.
You have completed your first single crochet stitch. This follows the standard single crochet method used by the Craft Yarn Council.
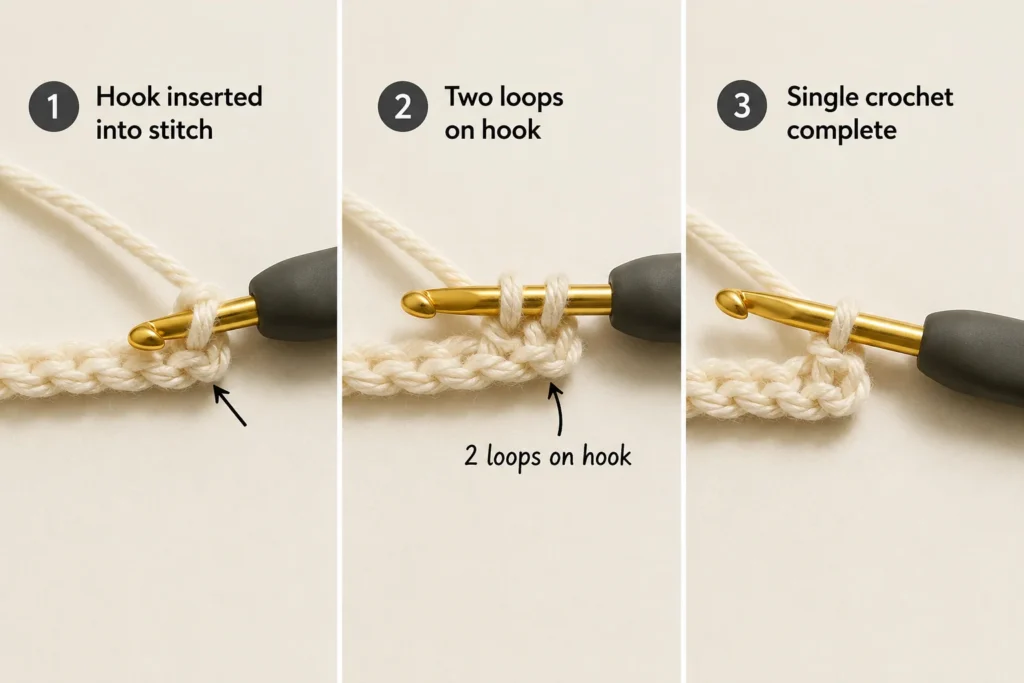
Look at the top of the stitch. You should start to see a small V shape.
That V becomes important when you crochet the next row.
Step 7: Single Crochet Across the Rest of the Chain
Move to the next unused chain.
Repeat the same four movements:
- Insert the hook into the next chain.
- Yarn over and pull up a loop.
- Check that two loops are on the hook.
- Yarn over and pull through both loops.
Continue until you reach the end of the foundation chain.
Because you started with 11 chains and skipped the first chain, you should finish Row 1 with:
10 single crochet stitches.
Count them before moving on.
The Craft Yarn Council uses the same basic structure in beginner patterns: work the first single crochet into the second chain from the hook, then continue across the remaining chains.
How to Start the Second Row of Single Crochet
Making the stitch itself is usually easier than figuring out where the next row begins.
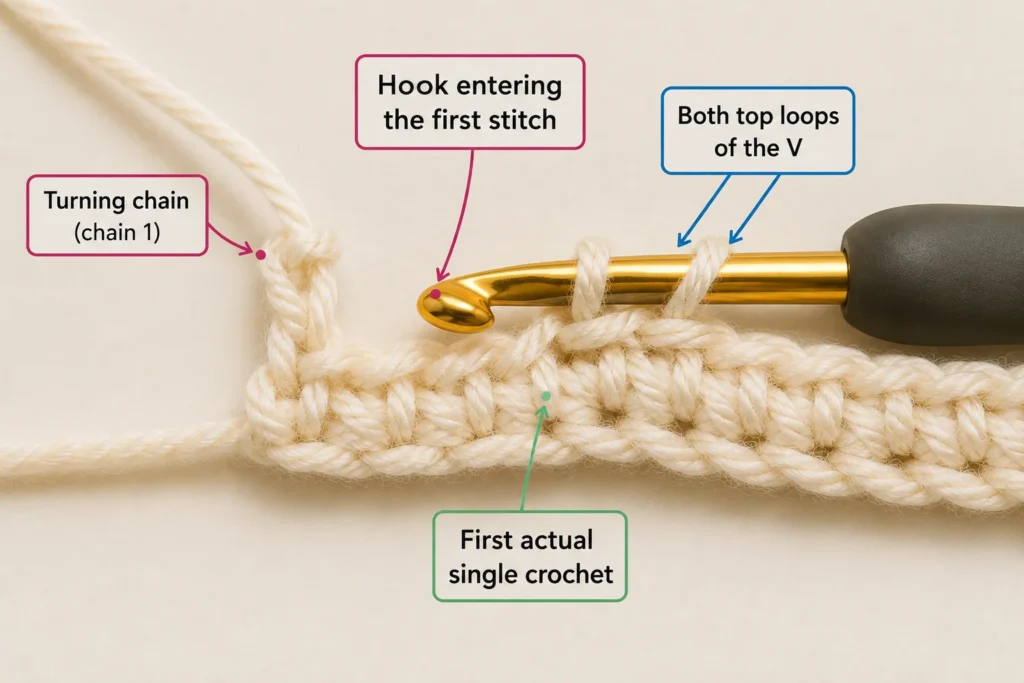
Here is the simple version.
Step 1: Chain 1
After completing the final single crochet of Row 1, make one chain stitch.
This raises the working yarn enough to begin another row of short single crochet stitches.
For standard single crochet instructions, this chain 1 normally does not count as a stitch unless your pattern specifically tells you otherwise. The Craft Yarn Council’s crochet pattern reading guide also shows how chain and single crochet instructions are written in standard patterns.
Step 2: Turn Your Work
Turn the crochet piece so you can work back across the row you just completed.
Keep the working loop on your hook while you turn.
Step 3: Find the First Real Stitch
Look across the top edge of your first row.
Each single crochet has a small V-shaped top.
The chain 1 you just made is your turning chain. Do not automatically treat it as one of the 10 single crochet stitches.
Find the first actual single crochet at the edge of the row.
Step 4: Insert Under Both Top Loops
Insert the hook underneath the two strands that form the V at the top of the first stitch.
These are commonly called the front loop and back loop.
Unless a pattern specifically tells you to work in the front loop only or back loop only, working under both loops is the usual placement.
Step 5: Make a Single Crochet
Now repeat the stitch:
- Insert hook under the top loops.
- Yarn over.
- Pull up a loop.
- You should have two loops on the hook.
- Yarn over.
- Pull through both loops.
Continue across the row.
When you finish Row 2, count your stitches again.
You should still have:
10 single crochet stitches.
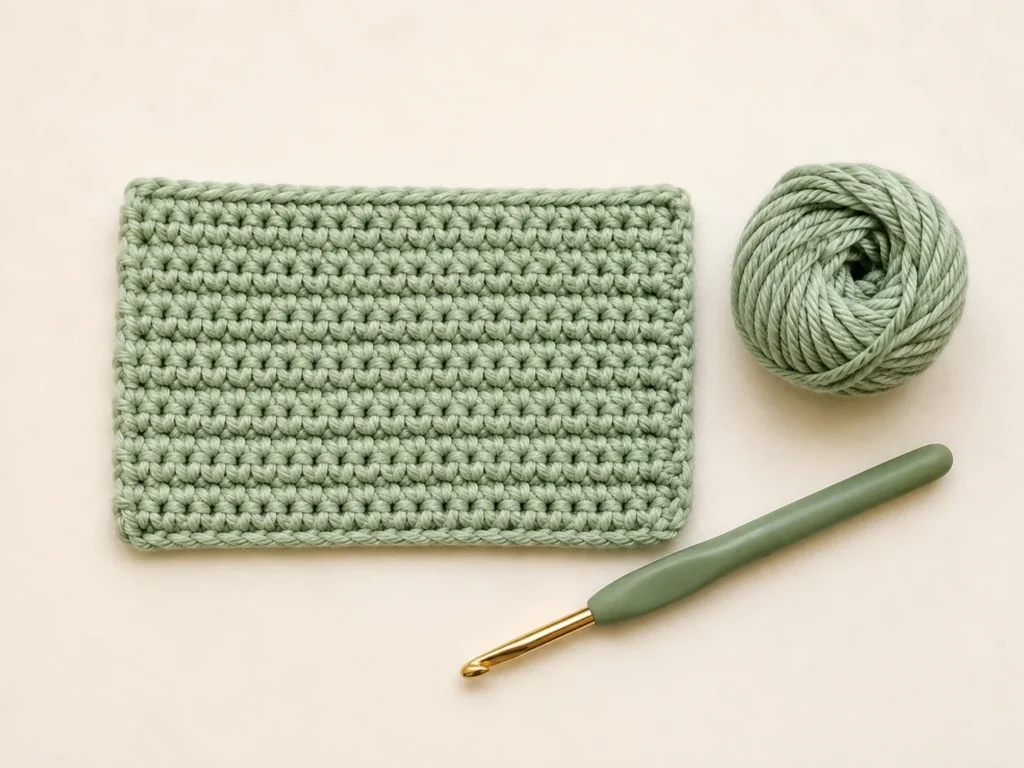
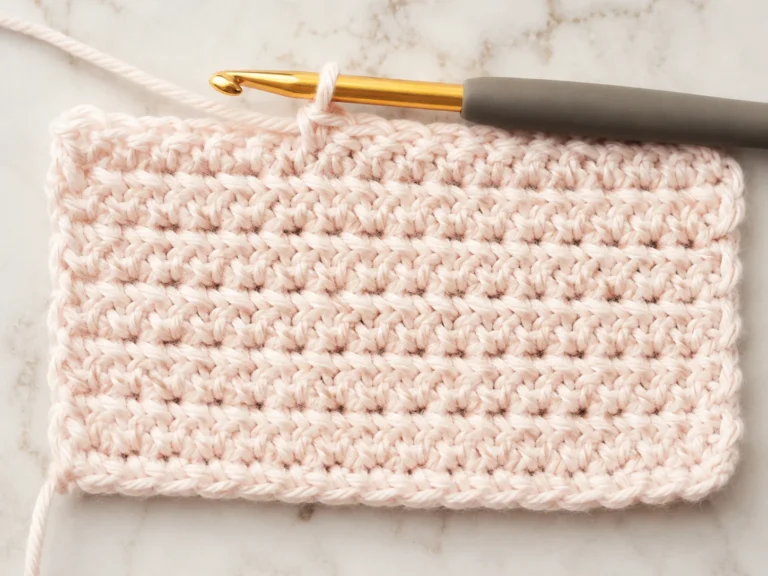
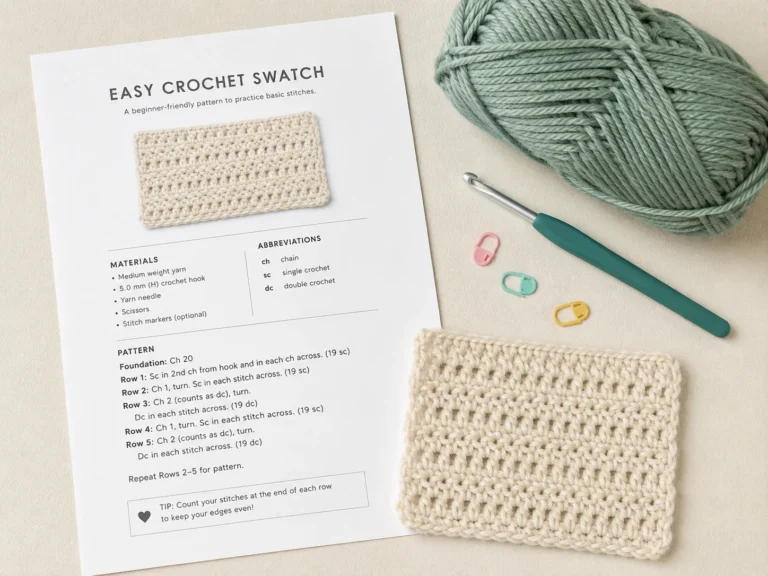
A Simple Single Crochet Practice Swatch
Before trying a larger project, practice keeping the same number of stitches from row to row.
Use this exercise:
Foundation: Chain 11.
Row 1: Single crochet in the second chain from the hook and in every remaining chain across. You should have 10 sc.
Row 2: Chain 1 and turn. Single crochet in the first stitch and every stitch across. You should still have 10 sc.
Rows 3–10: Repeat Row 2.
Your main goal is not a specific finished width.
Instead, check three things:
- Every row has 10 stitches.
- Both side edges stay reasonably straight.
- Your stitches become more even as you practice.
If you finish 10 rows with 10 stitches in every row, you have practiced one of the most useful habits in crochet: counting before small errors become big ones.
How to Recognize a Single Crochet Stitch
Look closely at the top of your crocheted fabric.
Each completed single crochet should have a small V at the top.
That V represents one stitch.
When counting stitches across a row, count those V shapes rather than counting the vertical bumps on the front of the fabric.
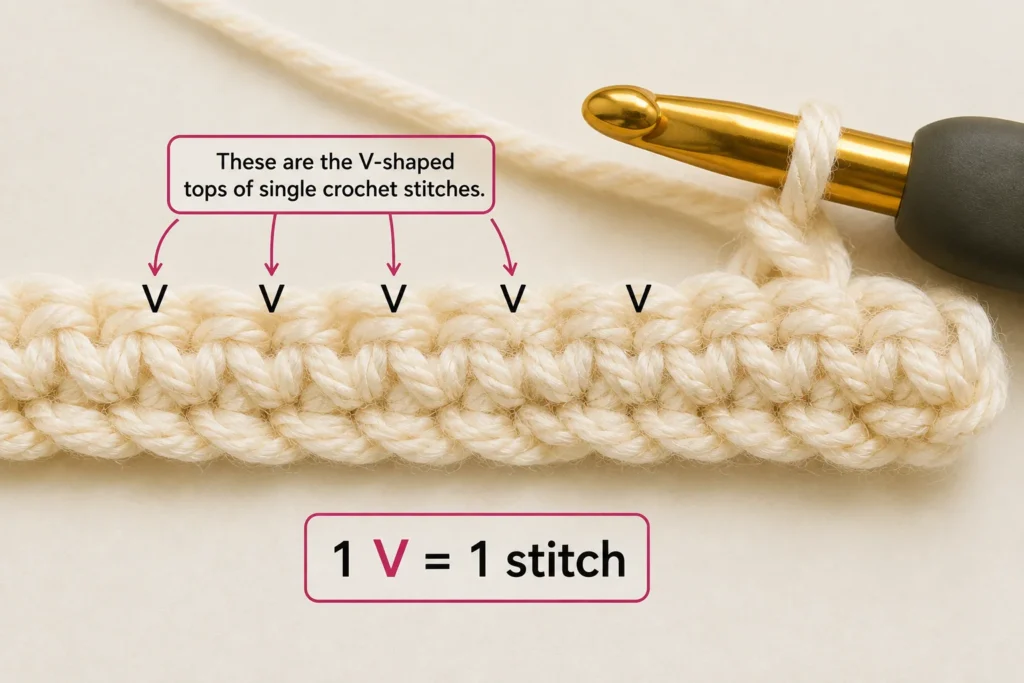
For a 10-stitch practice swatch, you should find:
10 V shapes across the top edge.
The working loop on your hook is not an extra stitch.
Why Is My Crochet Getting Wider?
If your swatch becomes wider every row, you are probably adding stitches accidentally.
Common causes include:
- Working into the turning chain as if it were another single crochet
- Putting two stitches into the same edge stitch
- Crocheting into a space that is not part of the original stitch count
Count your stitches after every row.
If you started with 10 sc, each normal practice row should still contain 10 sc.
Finding the mistake after one row is much easier than discovering it five rows later.
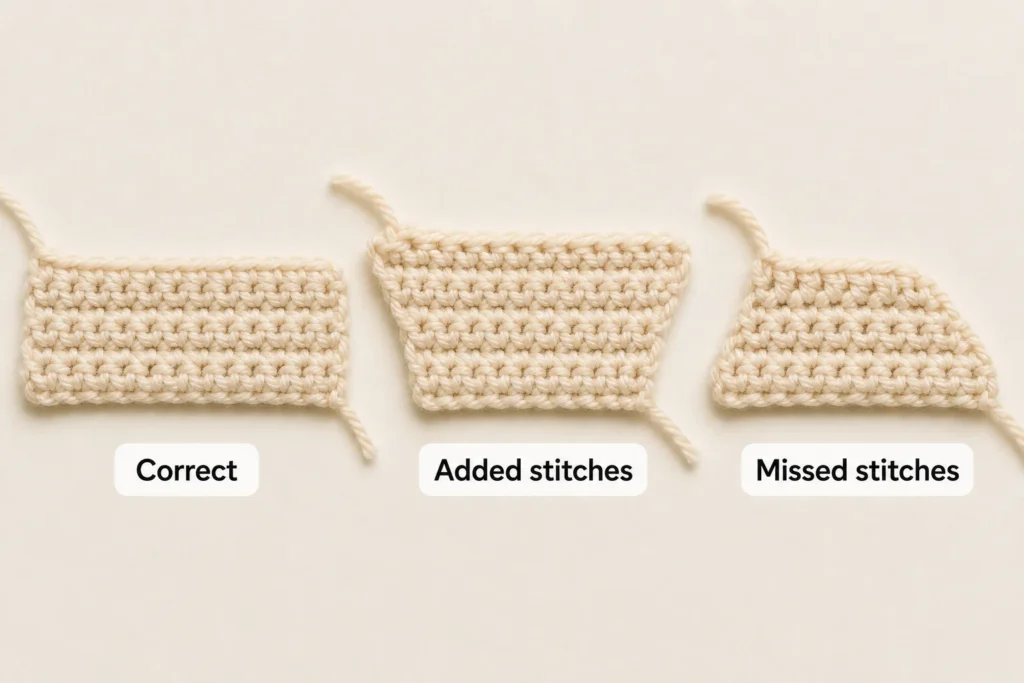
Why Is My Crochet Getting Narrower?
A narrowing swatch usually means stitches are being skipped.
The first and last stitches are the easiest ones to miss because they can sit close to the edge and look different from the stitches in the center.
At the beginning of each row:
- Make your chain 1.
- Turn.
- Find the first actual V-shaped stitch.
- Work into it.
- Count across before starting the next row.
If you had 10 stitches and now have nine, check the edges first.
Lia’s Tip: When I was learning, the edge stitches were some of the easiest ones to miss because they did not look as obvious as the stitches in the center. Counting every row helped me catch the problem before the sides started narrowing.
Why Is It Hard to Push My Hook Into the Stitches?
Your tension may be too tight.
Beginners often pull the working yarn after every movement because they are trying to make the stitches look neat. That can shrink the loops until the hook barely fits through them.
Try relaxing your yarn hand slightly.
The loops should be controlled, but they should still slide along the shaft of the hook.
If your foundation chain is extremely tight, you can also remake it more loosely before continuing.
Why Do My Single Crochet Stitches Look Uneven?
Uneven stitches are normal while you are learning.
The size of each stitch depends partly on how much yarn you allow into the loops as you work.
Focus on repeating the same movements instead of repeatedly tightening completed stitches.
Your first goal should be:
consistent motion and correct stitch count.
Perfect-looking tension can come later.
What If I Accidentally Crochet Through Only One Loop?
Your stitch can still be formed, but the fabric will look different.
Patterns sometimes intentionally tell you to work through the front loop only or back loop only to create texture.
For standard practice, place the hook under both strands of the V at the top of the stitch.
If you accidentally use only one loop for a stitch or two, you can undo those stitches and remake them if you want the practice swatch to stay consistent.
Single Crochet in Rows vs. Single Crochet in Rounds
The actual single crochet movement stays the same:
insert → yarn over → pull up loop → yarn over → pull through two loops.
What changes is how the stitches are arranged.
When working rows, you usually turn and work back across the previous row.
When making projects such as amigurumi, single crochet is often worked in rounds instead of back-and-forth rows.
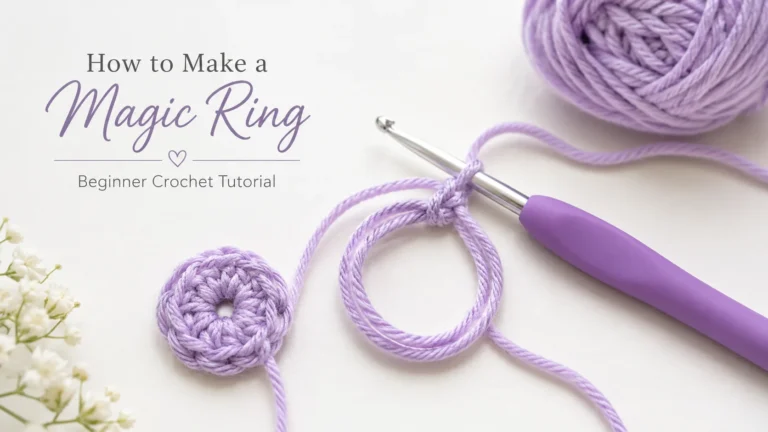
Many round projects begin with an adjustable loop, so learn how to make a magic ring in crochet before practicing single crochet in the round.
The stitch itself does not change, so learning clean single crochet rows gives you a useful foundation before moving into round projects.
Beginner Checklist: Is Your Single Crochet Correct?
Before moving to another stitch, check that you can do these things:
- Find the second chain from the hook.
- Insert the hook without splitting the yarn.
- Pull up a loop and recognize two loops on the hook.
- Pull through both loops to complete the stitch.
- Recognize the V at the top of a completed stitch.
- Chain 1 and turn for another row.
- Find the first and last stitch.
- Keep the same stitch count across several rows.
If you can work a small swatch while keeping the sides fairly straight and the stitch count consistent, you are ready to use single crochet in simple projects.
Frequently Asked Questions
Does chain 1 count as a single crochet?
In standard single crochet rows, the chain 1 used for turning generally does not count as a stitch unless the pattern says otherwise.
Always follow the instructions for the specific pattern you are making.
Why do you single crochet into the second chain from the hook?
The first chain is skipped so the working yarn has enough height to begin the first single crochet row. Standard Craft Yarn Council beginner instructions also place the first sc in the second chain from the hook.
How many loops should be on the hook during single crochet?
After inserting the hook and pulling up a loop, you should have two loops on the hook.
Yarn over again and pull through both loops.
You will finish with one loop remaining on the hook.
Where do I put my hook on the second row?
Look for the V at the top of the first single crochet stitch. Insert the hook beneath the top loops of that stitch unless your pattern tells you to use a different loop or space.
Why do I keep losing stitches?
The most common place to miss a stitch is along the edge of the row.
Count your stitches after every practice row and pay special attention to the first and last V-shaped stitches.
What to Learn After Single Crochet
Once you can make single crochet without constantly checking every movement, practice a small square until your stitch count stays consistent.
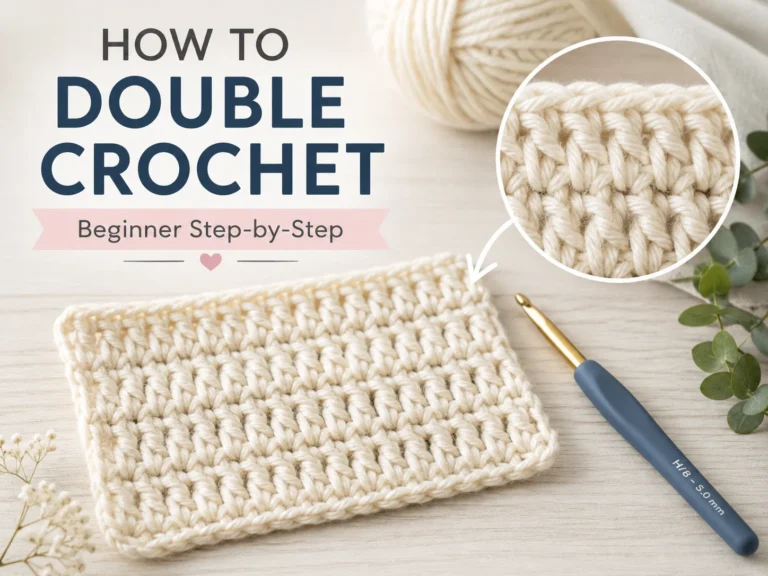
From there, you can start using single crochet in actual projects, learn how to work it in the round, or move to taller stitches such as half double crochet and double crochet.
The stitch motion is simple. The real beginner skill is learning to recognize where the next stitch belongs. Once that becomes easy to see, crochet starts feeling much more predictable.
7 Comments