
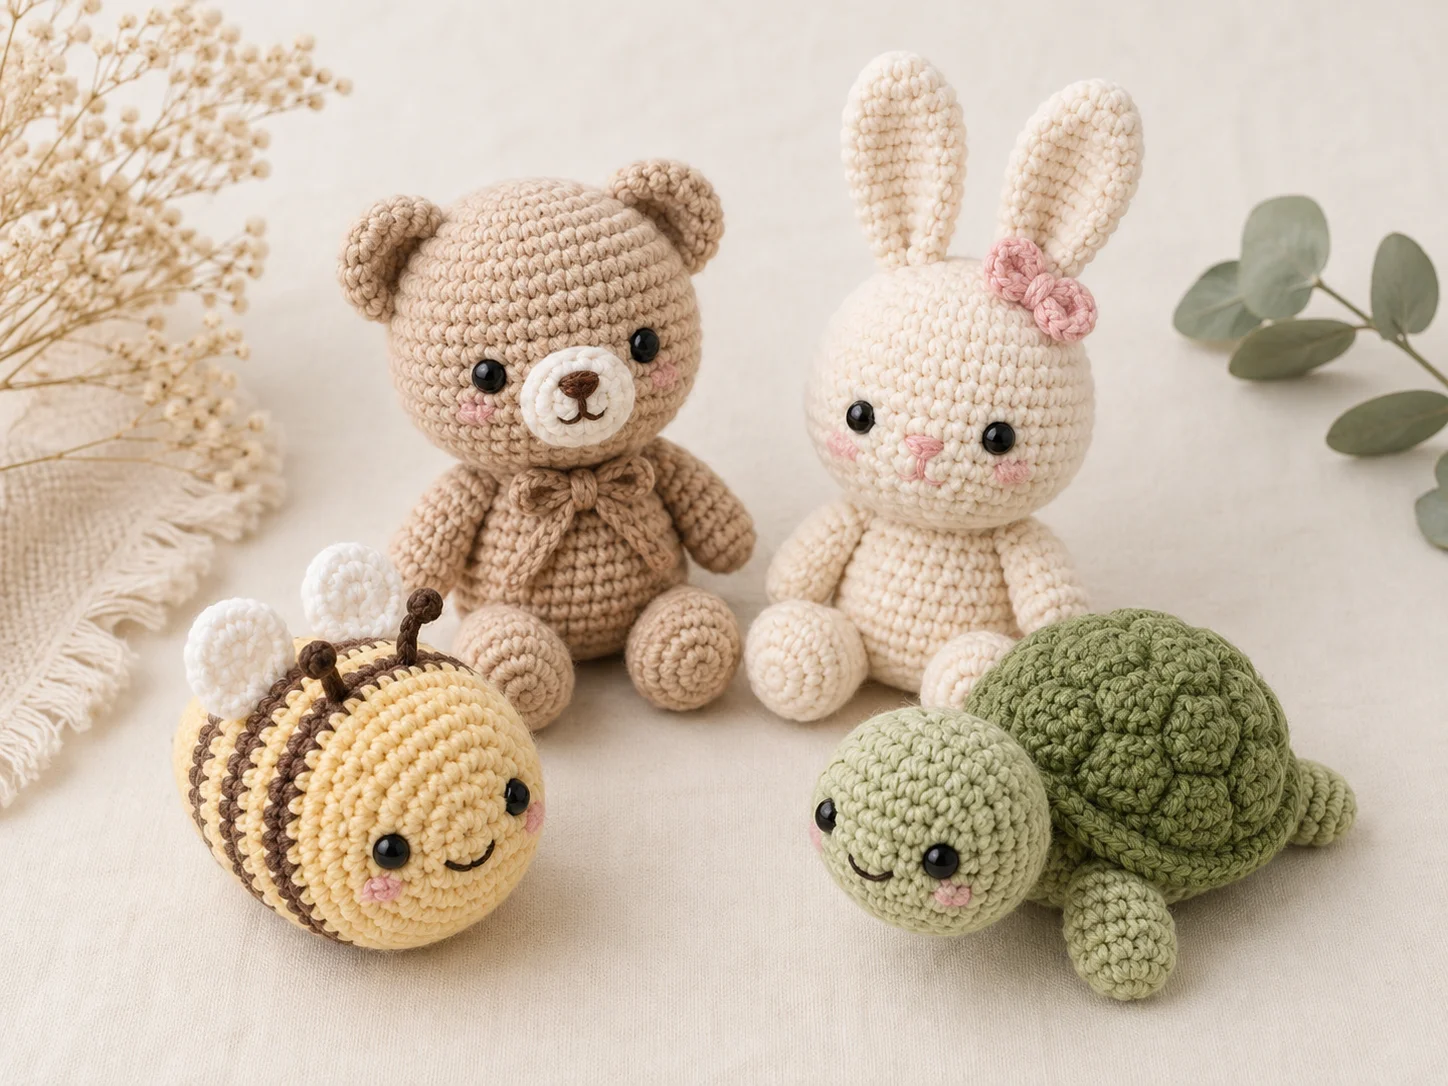
How to Make Amigurumi for Beginners: Your First Crochet Animal
If you’ve ever looked at a cute crochet animal and thought, “There’s no way I can make that,” you’re not alone. Amigurumi may look complicated at first, but beginner-friendly crochet animals are usually made with just a few simple stitches repeated in rounds.
In this guide, you’ll learn how to make amigurumi for beginners step by step, from creating a magic ring and increasing stitches to stuffing, shaping, and finishing your first crochet animal. You don’t need advanced crochet skills or expensive supplies. If you can make a basic single crochet, you’re ready to start.
By the end, you’ll understand the core techniques used in hundreds of amigurumi patterns and have the confidence to begin your first small crochet animal.
In this guide, you will learn what supplies to use, how amigurumi gets its shape, how to work in continuous rounds, when to add stuffing, how to attach the pieces, and how to avoid some of the most common beginner mistakes. If you are completely new to crochet, start with our beginner crochet guide before making your first stuffed animal.
What Is Amigurumi?
Amigurumi is the technique of crocheting or knitting small stuffed characters. Crochet is commonly used to create animals, dolls, food, plants, and other small decorative figures.
Beginner-friendly projects often include:
- Crochet bees
- Small bunnies
- Mini bears
- Turtles
- Frogs
- Whales
- Octopuses
- Simple dolls
Finished projects can look detailed, but a basic crochet animal is usually created from simple shapes such as circles, balls, tubes, and small flat pieces. The main skill is learning how to make those shapes wider or narrower while keeping track of your stitches.
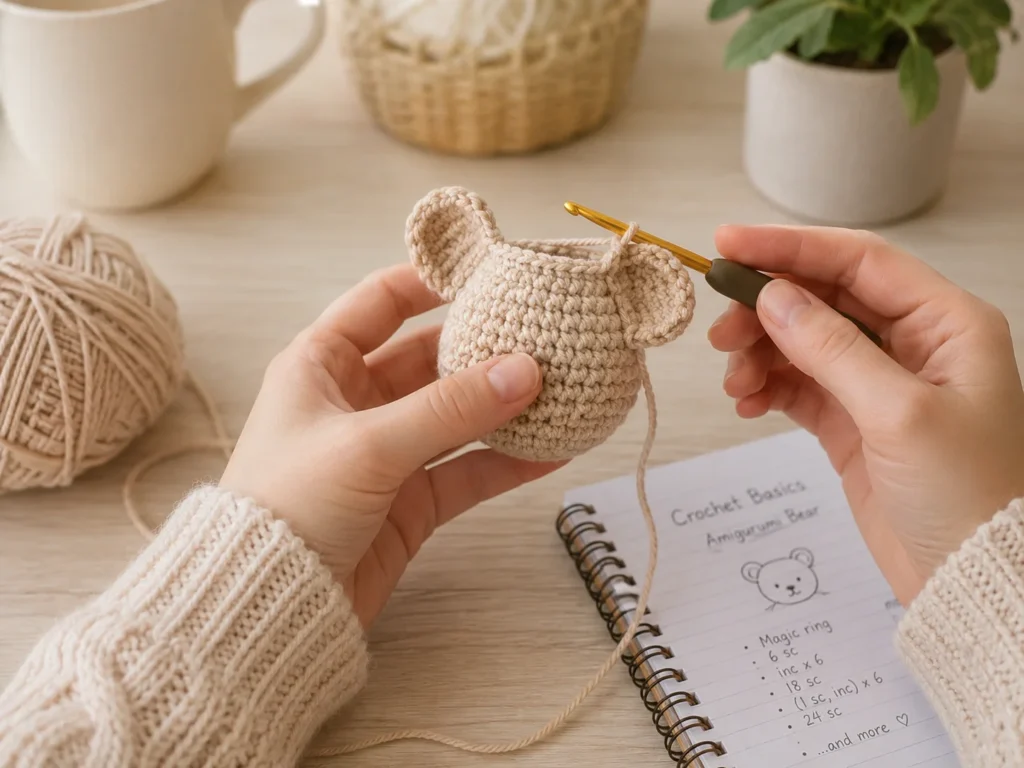
What You Need to Make Your First Amigurumi
You do not need a large collection of supplies for a beginner project. Start with:
- A crochet hook
- Smooth medium-weight yarn
- Toy stuffing
- A yarn or tapestry needle
- Scissors
- Stitch markers
- Embroidery thread or suitable eyes for your project
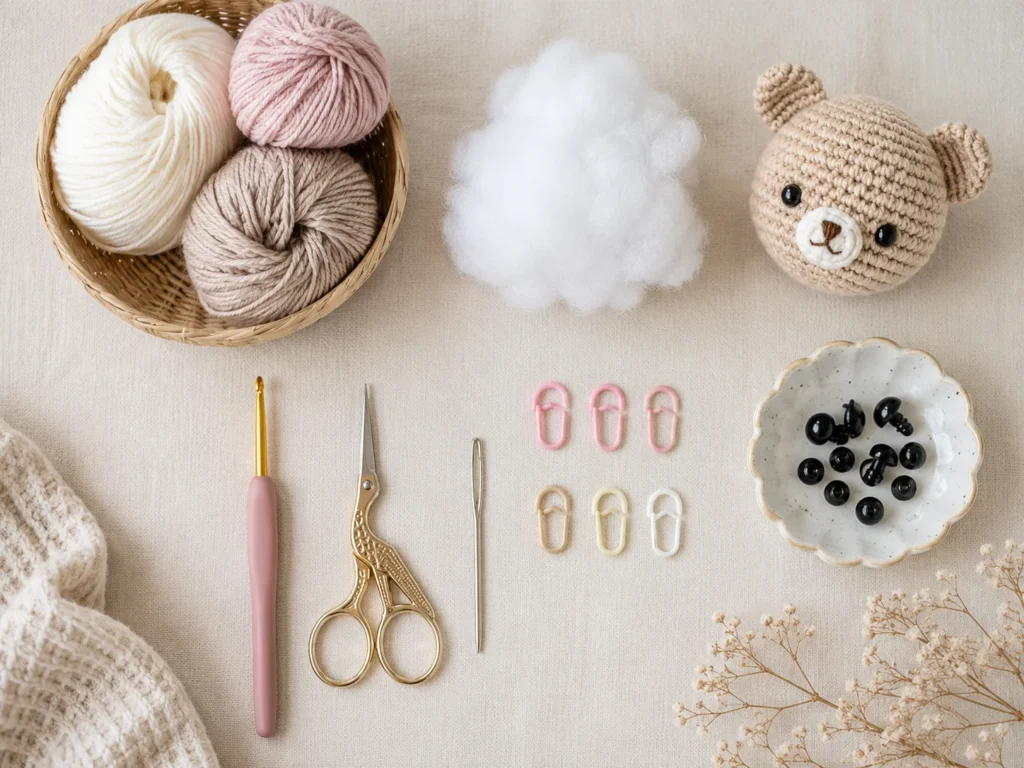
Light-colored, smooth yarn is easier to work with because the individual stitches are easier to see. Choose a hook that creates a firm fabric without making the stitches painfully tight. Amigurumi is usually worked more tightly than a loose scarf or blanket so the finished piece holds its shape and the stuffing stays inside.
For your first project, avoid very fluffy, textured, or dark yarn because it can make counting stitches much harder.
Step 1: Start With a Magic Ring
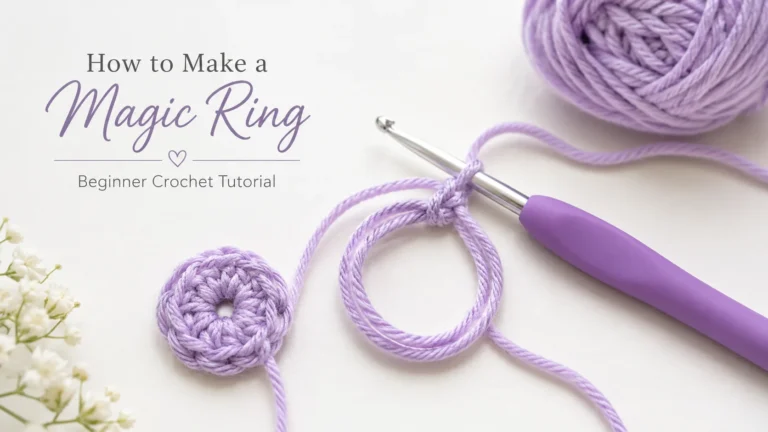
Many amigurumi patterns begin with a magic ring because it allows you to crochet several stitches into a small adjustable loop. The magic ring often feels awkward the first few times you try it, so do not worry if it takes several attempts.
Create the loop, insert your hook, pull up the working yarn, and begin making single crochet stitches into the center of the ring. Once the required stitches are complete, gently pull the yarn tail to close the center.
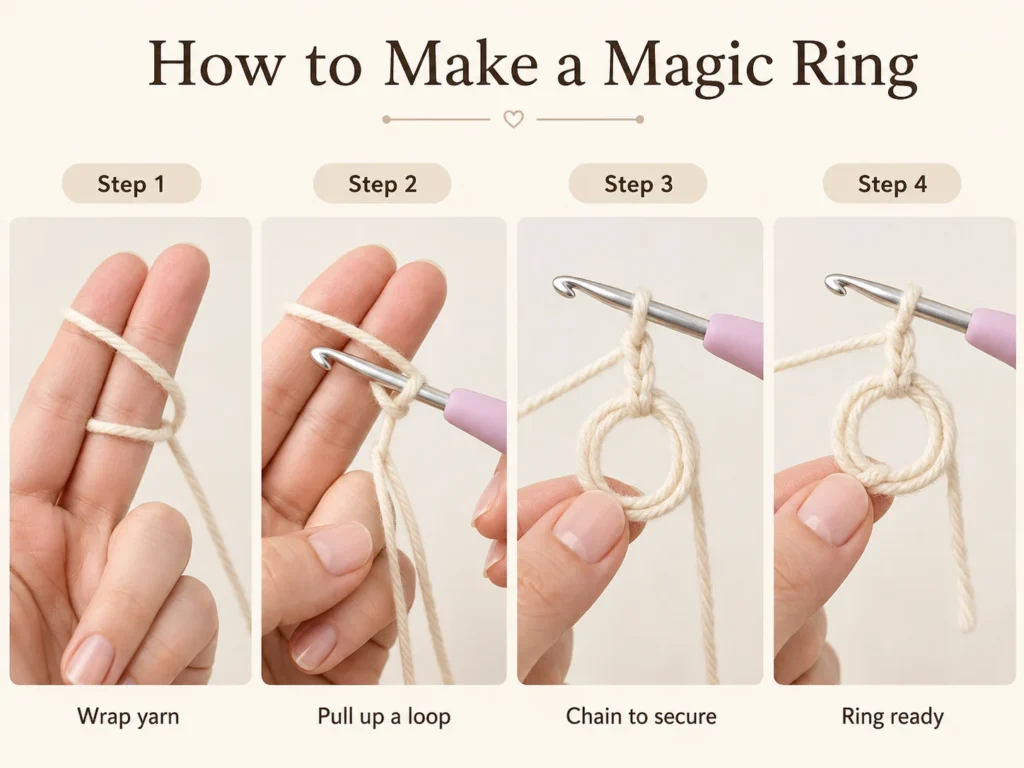
You should now have a small crochet circle. That circle can eventually become the top of a head, the bottom of a body, or the beginning of another rounded piece.
Step 2: Learn How Increases Create Shape
Amigurumi becomes three-dimensional by changing the number of stitches in each round. An increase usually means working two stitches into the same stitch. Adding increases makes the crochet circle grow wider.
For example, a pattern may begin with a small circle and then add increases evenly around several rounds. As the number of stitches grows, the piece becomes larger. The exact stitch counts will depend on the pattern you are following, so count carefully after each round.
Step 3: Use Decreases to Make the Piece Narrower
A decrease reduces the number of stitches and helps the crochet shape become narrower. This is how a wide section can gradually close into a rounded head or body.
A simple amigurumi shape often follows this pattern:
- Begin with a small circle.
- Increase to make it wider.
- Crochet several rounds without increasing.
- Decrease to make it narrower again.
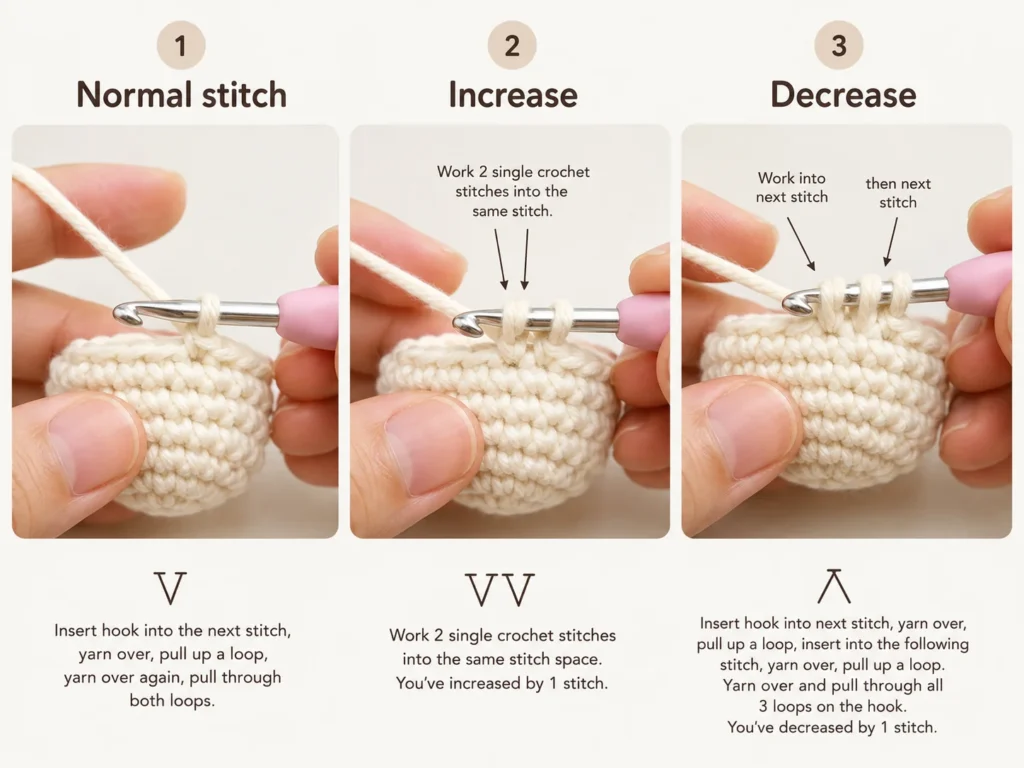
Once you understand that basic structure, many amigurumi patterns become easier to follow.
Step 4: Keep Track of Every Round
Amigurumi is often worked in a continuous spiral. Because there may be no obvious join showing where one round finishes and the next begins, it is easy to lose your place.
Place a stitch marker in the first stitch of the round. When you return to the marker, you know that the round is complete. Move the marker into the first stitch of the new round and continue.
Counting is especially important when the pattern includes increases or decreases. Even one missed stitch can gradually change the shape of the finished piece.
Step 5: Add Stuffing Gradually
Once the crochet piece begins to form a three-dimensional shape, start adding stuffing. Use small amounts at a time rather than pushing a large amount into the piece all at once.
Spread the stuffing into the corners and edges with your fingers so the shape fills evenly. Too much stuffing can stretch the crochet fabric and make gaps more noticeable, while too little can leave the animal looking flat.
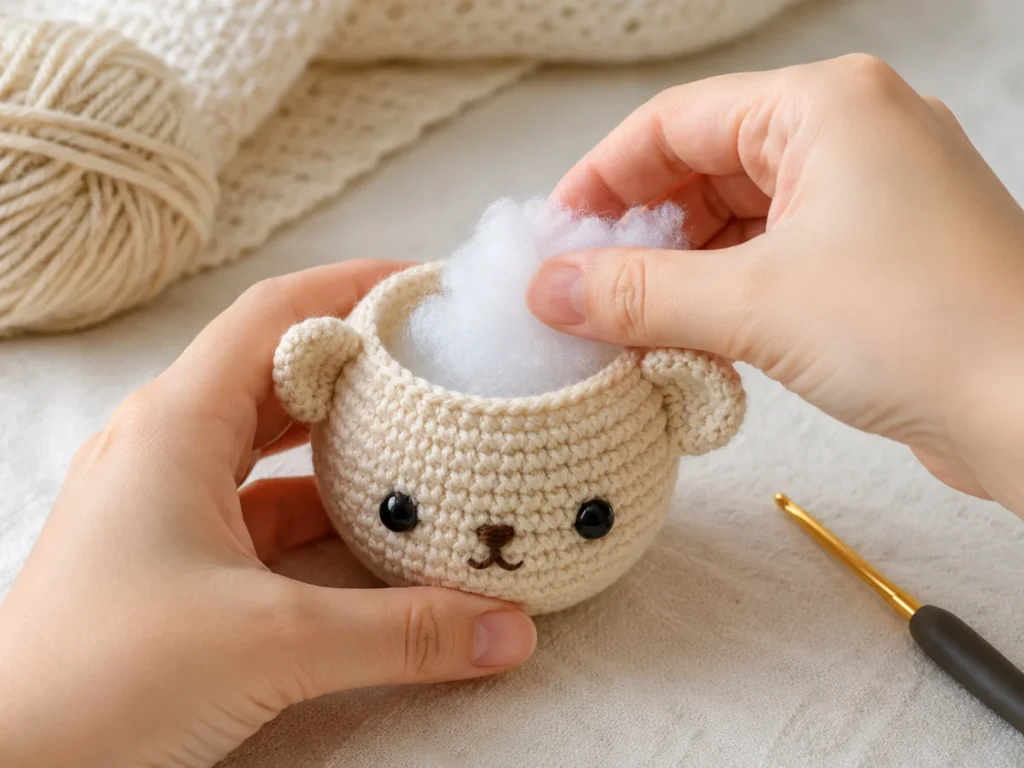
Aim for a shape that feels firm enough to hold its form without being stretched excessively. If the opening becomes very small later in the pattern, add most of the stuffing before completing the final decrease rounds.
Step 6: Add the Face
The position of the eyes, nose, and mouth can make a big difference to the final expression. Before permanently attaching facial features, check their placement from different angles.
Moving the eyes slightly closer together, farther apart, higher, or lower can completely change the character’s appearance. Embroidery thread can also be used to create simple eyes, noses, mouths, and eyebrows.
For amigurumi made for babies or children under 3, use embroidered facial features instead of detachable plastic eyes or other small parts that could become a choking hazard. Do not worry if the face is not perfectly symmetrical. Small differences are normal in handmade work.
Step 7: Attach the Head, Arms, Legs, and Ears
Depending on the pattern, you may finish with several separate crochet pieces that need to be assembled. Before sewing, place the pieces where you think they should go.
You can temporarily pin them in position so you can check:
- Whether the ears are level
- Whether the arms sit at the same height
- Whether the legs allow the animal to sit or stand correctly
- Whether the head faces the direction you want
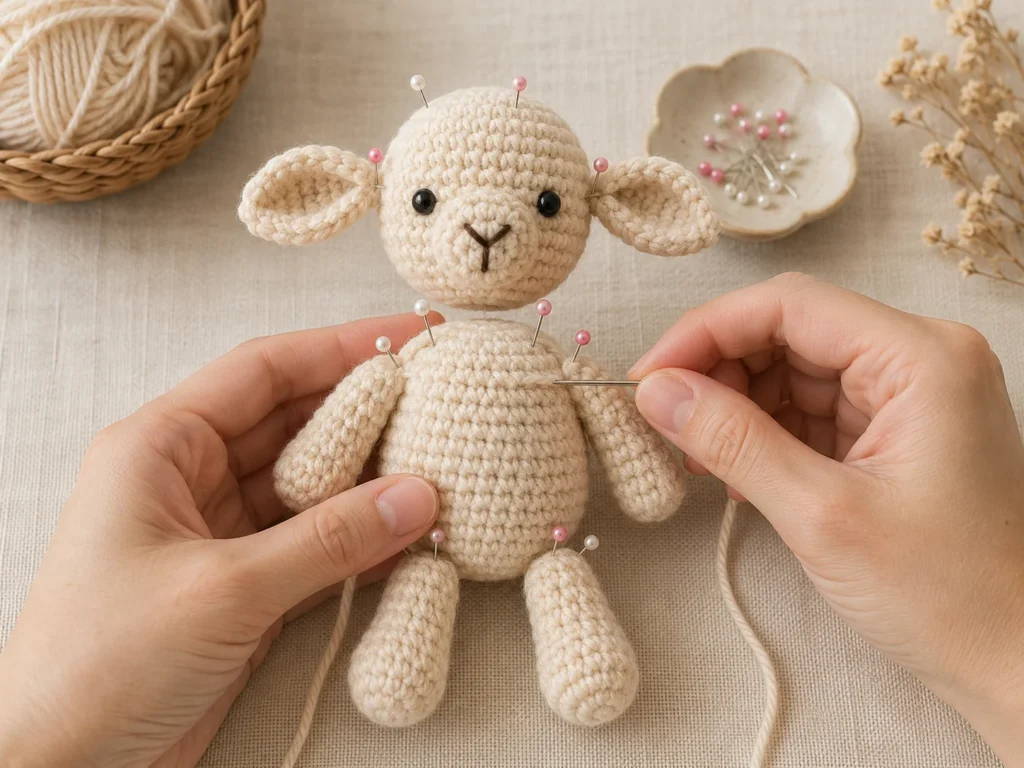
Once you are happy with the placement, use a yarn needle and matching yarn to sew each piece securely into position. Take your time with this step because careful placement can make a simple crochet animal look much neater.
What If Your First Amigurumi Looks Uneven?
Your first crochet animal probably will not look exactly like the finished photograph in a pattern. One ear may sit slightly higher, the body may lean, or your stitches may become tighter in one section and looser in another.
These are common beginner issues, and most improve naturally as your stitch tension and counting become more consistent. Instead of repeatedly restarting because of tiny imperfections, finish the project and use it as practice.
You will learn much more from completing one simple animal than from trying to make every early stitch perfect.
Best Amigurumi Projects for Beginners
Choose a first project with a simple body shape and only a few separate pieces. Good options include:
- A round crochet bee
- A simple whale
- A small octopus
- A basic bunny
- A tiny turtle
- A crochet chick
- A simple frog
- A mini bear
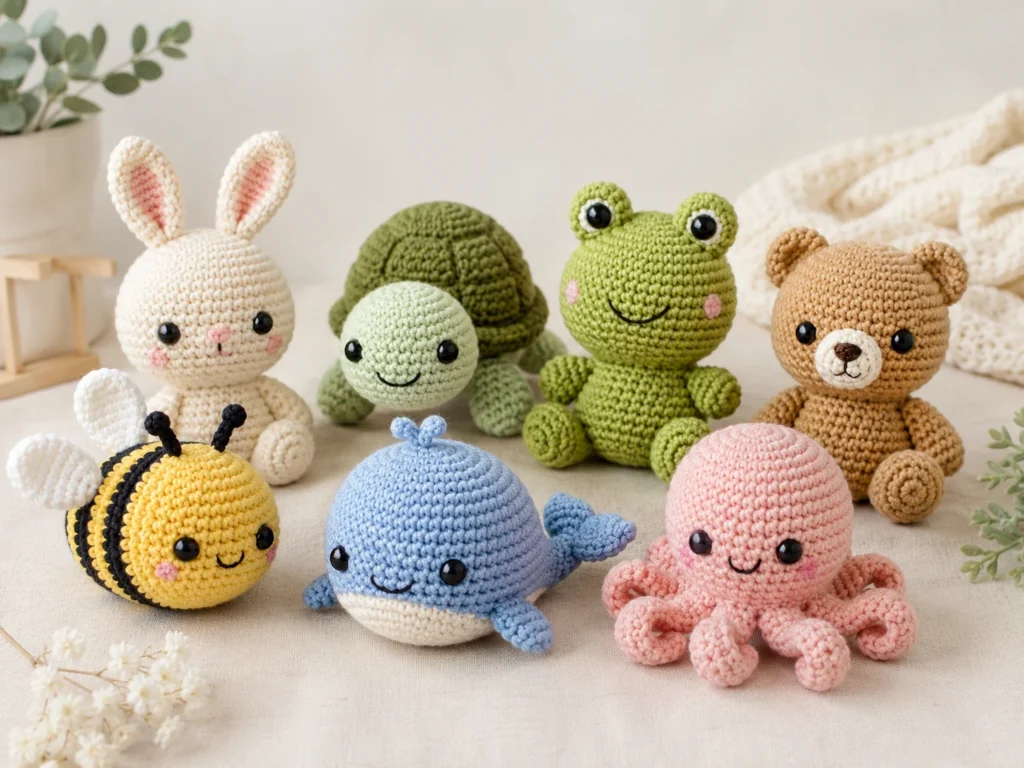
For your first project, avoid designs with many small fingers, complicated clothing, frequent color changes, or a large number of pieces. A simple project lets you concentrate on stitch counting, shaping, stuffing, and assembly.
Common Problems When Learning How to Make Amigurumi for Beginners
Why Can I See the Stuffing Through My Stitches?
Your stitches may be too loose, or the piece may contain too much stuffing. Try maintaining slightly firmer tension or using a hook size that creates a denser fabric.
Why Does My Amigurumi Have the Wrong Shape?
Check your stitch count against the pattern. A missed increase, decrease, or stitch can change the shape, especially when the error continues for several rounds.
Why Do I Keep Losing the Beginning of the Round?
Use a stitch marker in the first stitch of every round and move it each time you begin a new round. This makes it much easier to track your progress.
Why Are My Arms or Ears Uneven?
Check that matching pieces have the same number of stitches and rounds. Before sewing them permanently, pin both pieces in place and compare their positions from different angles.
Why Is Sewing the Pieces Together Difficult?
Pin each part before you begin sewing and attach it with small, controlled stitches. Do not tighten each stitch excessively because this can pull the pieces out of position.
What Should You Learn Next?
Once you have completed your first simple crochet animal, useful skills to learn next include:
- Invisible decreases
- Color changes
- Crocheting different shapes
- Embroidered facial details
- Joining pieces neatly
- Reading amigurumi patterns
- Working with smaller hooks and yarn
- Making projects with several body parts
Do not try to learn everything in one project. Choose a pattern that introduces one or two new techniques at a time.
Frequently Asked Questions
Is Amigurumi Hard for Beginners?
Simple amigurumi can be suitable for beginners once they understand single crochet, basic increases and decreases, and how to count stitches. The first few rounds may take longer because you are learning to work in a small circle, but the movements become easier with practice.
What Crochet Stitch Is Most Common in Beginner Amigurumi?
Single crochet is one of the main stitches used in many beginner amigurumi projects because it creates a compact fabric and is easy to repeat around a shape.
Do I Need to Know How to Crochet Before Making Amigurumi?
You should be comfortable with basic crochet movements before starting. If you have never held a crochet hook before, first learn how to make a slip knot, chain, and single crochet in our crochet guide for absolute beginners.
Why Is a Stitch Marker Important in Amigurumi?
A stitch marker helps you identify the beginning of each round when working in a continuous spiral. Without one, it can be difficult to tell exactly where one round ends and the next begins.
How Much Stuffing Should I Put in an Amigurumi?
Add enough stuffing for the animal to hold its intended shape without stretching the crochet fabric excessively. Add it gradually so you can adjust the firmness as you work.
Final Thoughts
Learning how to make amigurumi for beginners becomes much easier once you stop thinking of the finished animal as one complicated project. Start with a small circle, learn how increases make it wider and decreases make it narrower, count each round, add stuffing gradually, and take your time when attaching the pieces.
The easiest way to learn how to make amigurumi for beginners is to start with one simple shape and practice counting each round carefully.
Your first animal may not be perfectly symmetrical, but finishing it will teach you the skills you need for the next one. Choose a simple pattern, keep your stitch marker nearby, and focus on one round at a time.
2 Comments